1 - Anonymous strategy
Access Kiali with no authentication.
Introduction
The anonymous strategy removes any authentication requirement. Users will
have access to Kiali without providing any credentials.
Although the anonymous strategy doesn’t provide any access protection, it’s
valid for some use-cases. Some examples known from the community:
- Exposing Kiali through a reverse proxy, where the reverse proxy is providing a custom authentication mechanism.
- Exposing Kiali on an already limited network of trusted users.
- When Kiali is accessed through
kubectl port-forward or alike commands that allow usage of the cluster’s RBAC capabilities to limit access.
- When developing Kiali, where a developer has a private instance on his own machine.
It’s worth to emphasize that the anonymous
strategy will leave Kiali unsecured. If you are using this option, make sure
that Kiali is available only to trusted users, or access is protected by other
means.
Set-up
To use the anonymous strategy, use the following configuration in the Kiali CR:
spec:
  auth:
    strategy: anonymous
The anonymous strategy doesn’t have any additional configuration.
Access control
When using the anonymous strategy, the content displayed in Kiali is based on
the permissions of the Kiali service account. By default, the Kiali service
account has cluster wide access and will be able to display everything in the
cluster.
OpenShift
If you are running Kiali in OpenShift, access can be customized by changing
privileges to the Kiali ServiceAccount. For example, to reduce permissions to
individual namespaces, first, remove the cluster-wide permissions granted by
default:
oc delete clusterrolebindings kiali
Then grant the kiali role only in needed namespaces. For example:
oc adm policy add-role-to-user kiali system:serviceaccount:istio-system:kiali-service-account -n ${NAMESPACE}
View only
You can tell the Kiali Operator to install Kiali in “view only”
mode (this does work for either OpenShift or Kubernetes). You do this by
setting the view_only_mode to true in the Kiali CR, which
allows Kiali to read service mesh resources found in the cluster, but it does
not allow any change:
spec:
  deployment:
    view_only_mode: true
2 - Header strategy
Run Kiali behind a reverse proxy responsible for injecting the user’s token, or a token with impersonation.
Introduction
The header strategy assumes a reverse proxy is in front of Kiali, such as
OpenUnison or OAuth2 Proxy, injecting the user’s identity into each request to
Kiali as an Authorization header. This token can be an OpenID Connect
token or any other token the cluster recognizes. All requests to Kubernetes
will be made with this token, allowing Kiali to use the user’s own RBAC
context.
In addition to a user token, the header strategy supports impersonation
headers. If the impersonation headers are present in the request, then Kiali
will act on behalf of the user specified by the impersonation (assuming the
token supplied in the Authorization header is authorized to do so).
The header strategy takes advantage of the cluster’s RBAC. See the
Role-based access control documentation for more details.
Set-up
The header strategy will work with any Kubernetes cluster. The token provided
must be supported by that cluster. For instance, most “on-prem” clusters support
OpenID Connect, but cloud hosted clusters do not. For clusters that don’t support
a token, the impersonation
headers can be injected by the reverse proxy.
spec:
  auth:
    strategy: header
The header strategy doesn’t have any additional configuration.
The header strategy looks for a token in the Authorization HTTP header with the
Bearer prefix. The HTTP header should look like:
Authorization: Bearer TOKEN
Where TOKEN is the appropriate token for your cluster. This TOKEN will be
submitted to the API server via a TokenReview to validate the token ONLY
on the first access to Kiali. On subsequent calls the TOKEN is passed through
directly to the API server.
Security Considerations
Network Policies
A policy should be put in place to make sure that the only “client” for Kiali is
the authenticating reverse proxy. This helps limit potential abuse and ensures
that the authenticating reverse proxy is the source of truth for who accessed
Kiali.
Short Lived Tokens
The authenticating reverse proxy should inject a short lived token in the
Authorization header. A shorter lived token is less likely to be abused if
leaked. Kiali will take whatever token is passed into the reqeuest, so as tokens
are regenerated Kiali will use the new token.
Impersonation
TokenRequest API
The authenticating reverse proxy should use the TokenRequest API instead of static
ServiceAccount tokens when possible while using impersonation. The
ServiceAccount that can impersonate users and groups is privileged and having it
be short lived cuts down on the possibility of a token being leaked while it’s being
passed between different parts of the infrastructure.
The authenticating proxy MUST drop any headers it receives from a remote client
that match the impersonation headers. Not only do you want to make sure that the
authenticating proxy can’t be overriden on which user to authenticate, but also
what groups they’re a member of.
3 - OpenID Connect strategy
Access Kiali requiring authentication through a third-party OpenID Connect provider.
Introduction
The openid authentication strategy lets you integrate Kiali to an external
identity provider that implements OpenID Connect, and allows
users to login to Kiali using their existing accounts of a
third-party system.
If your
Kubernetes cluster is also integrated with your OpenId provider,
then Kiali’s openid strategy can offer role-based access control (RBAC) through the
Kubernetes authorization mechanisms. See the
RBAC documentation for more details.
Currently, Kiali supports the authorization code flow (preferred) and the
implicit flow of the OpenId Connect spec.
Requirements
If you want to enable usage of the OpenId’s authorization code flow, make
sure that the
Kiali’s signing key
is 16, 24 or 32 byte long. If you setup a signing key of a
different size, Kiali will only be capable of using the implicit flow. If you
install Kiali via the operator and don’t set a custom signing key, the operator
should create a 16 byte long signing key.
We recommend using the authorization code flow.
If you don’t need RBAC support, the only requirement is to have a
working OpenId Server where Kiali can be configured as a client application.
If you do need RBAC support, you need either:
The first option is preferred if you can manipulate your cluster API server
startup flags, which will result in your cluster to also be integrated with the
external OpenID provider.
The second option is provided for cases where you are using a managed
Kubernetes and your cloud provider does not support configuring OpenID
integration. Kiali assumes an implementation of a Kubernetes API server. For
example, a community user has reported to successfully configure Kiali’s OpenID
strategy by using
kube-oidc-proxy which is a
reverse proxy that handles the OpenID authentication and forwards the
authenticated requests to the Kubernetes API.
Set-up with RBAC support
Assuming you already have a working Kubernetes cluster with OpenId integration
(or a working alternative like kube-oidc-proxy), you should already had
configured an application or a client in your OpenId server (some cloud
providers configure this app/client automatically for you). You must re-use
this existing application/client by adding the root path of your Kiali
instance as an allowed/authorized callback URL. If the OpenID server provided
you a client secret for the application/client, or if you had manually set a
client secret, issue the following command to create a Kubernetes secret
holding the OpenId client secret:
kubectl create secret generic kiali --from-literal="oidc-secret=$CLIENT_SECRET" -n $NAMESPACE
where $NAMESPACE is the namespace where you installed Kiali and
$CLIENT_SECRET is the secret you configured or provided by your OpenId
Server. If Kiali is already running, you may need to restart the Kiali pod so
that the secret is mounted in Kiali.
This secret is only needed if you want Kiali to
use the authorization code flow (i.e. if your Kiali’s signing key is neither
16, 24 or 32 byte long).
It’s worth emphasizing that to configure OpenID
integration you must re-use the OpenID application/client that you created for
your Kubernetes cluster. If you create a new application/client for Kiali in
your OpenId server, Kiali will fail to properly authenticate users.
Then, to enable the OpenID Connect strategy, the minimal configuration you need to
set in the Kiali CR is like the following:
spec:
  auth:
    strategy: openid
    openid:
      client_id: "kiali-client"
      issuer_uri: "https://openid.issuer.com"
This assumes that your Kubernetes cluster is configured with OpenID Connect
integration. In this case, the client-id and issuer_uri attributes must
match the --oidc-client-id and --oidc-issuer-url flags
used to start the cluster API server.
If these values don’t match, users will fail to login to Kiali.
If you are using a replacement or a reverse proxy for the Kubernetes API
server, the minimal configuration is like the following:
spec:
  auth:
    strategy: openid
    openid:
      api_proxy: "https://proxy.domain.com:port"
      api_proxy_ca_data: "..."
      client_id: "kiali-client"
      issuer_uri: "https://openid.issuer.com"
The value of client-id and issuer_uri must match the values of the
configuration of your reverse proxy or cluster API replacement. The api_proxy
attribute is the URI of the reverse proxy or cluster API replacement (only
HTTPS is allowed). The api_proxy_ca_data is the public certificate authority
file encoded in a base64 string, to trust the secure connection.
Set-up with no RBAC support
Register Kiali as a client application in your OpenId Server. Use the root path
of your Kiali instance as the callback URL. If the OpenId Server provides you a
client secret, or if you manually set a client secret, issue the following
command to create a Kubernetes secret holding the OpenId client secret:
kubectl create secret generic kiali --from-literal="oidc-secret=$CLIENT_SECRET" -n $NAMESPACE
where $NAMESPACE is the namespace where you installed Kiali and
$CLIENT_SECRET is the secret you configured or provided by your OpenId
Server. If Kiali is already running, you may need to restart the Kiali pod so
that the secret is mounted in Kiali.
This secret is only needed if you want Kiali to
use the authorization code flow (i.e. if your Kiali’s signing key is neither
16, 24 or 32 byte long).
Then, to enable the OpenID Connect strategy, the minimal configuration you need
to set in the Kiali CR is like the following:
spec:
  auth:
    strategy: openid
    openid:
      client_id: "kiali-client"
      disable_rbac: true
      issuer_uri: "https://openid.issuer.com"
As RBAC is disabled, all users logging into Kiali
will share the same cluster-wide privileges.
Additional configurations
Configuring the displayed user name
The Kiali front-end will, by default, retrieve the string of the sub claim of
the OpenID token and display it as the user name. You can customize which field
to display as the user name by setting the username_claim attribute of the
Kiali CR. For example:
spec:
  auth:
    openid:
      username_claim: "email"
If you enabled RBAC, you will want the username_claim attribute to match the
--oidc-username-claim flag used to start the Kubernetes API server, or the
equivalent option if you are using a replacement or reverse proxy of the API
server. Else, any user-friendly claim will be OK as it is purely informational.
By default, Kiali will request access to the openid, profile and email
standard scopes. If you need a different set of scopes, you can set the
scopes attribute in the Kiali CR. For example:
spec:
  auth:
    openid:
      scopes:
      - "openid"
      - "email"
      - "groups"
The openid scope is forced. If you don’t add it to the list of scopes to
request, Kiali will still request it from the identity provider.
Configuring authentication timeout
When the user is redirected to the external authentication system, by default
Kiali will wait at most 5 minutes for the user to authenticate. After that time
has elapsed, Kiali will reject authentication. You can adjust this timeout by
setting the authentication_timeout with the number of seconds that Kiali
should wait at most. For example:
spec:
  auth:
    openid:
      authentication_timeout: 60 # Wait only one minute.
Configuring allowed domains
Some identity providers use a shared login and regardless of configuring your
own application under your domain (or organization account), login can succeed
even if the user that is logging in does not belong to your account or
organization. Google is an example of this kind of provider.
To prevent foreign users from logging into your Kiali instance, you can
configure a list of allowed domains:
spec:
  auth:
    openid:
      allowed_domains:
      - example.com
      - foo.com
The e-mail reported by the identity provider is used for the validation. Login
will be allowed if the domain part of the e-mail is listed as an allowed
domain; else, the user will be rejected. Naturally, you will need to
configure the email scope to be requested.
There is a special case: some identity providers include a hd claim in the
id_token. If this claim is present, this is used instead of extracting the
domain from the user e-mail. For example, Google Workspace (aka G Suite)
includes this hd claim for hosted
domains.
Using an OpenID provider with a self-signed certificate
If your OpenID provider is using a self-signed certificate, you can disable
certificate validation by setting the insecure_skip_verify_tls to true in
the Kiali CR:
spec:
  auth:
    openid:
      insecure_skip_verify_tls: true
You should use self-signed certificates only for
testing purposes.
However, if your organization or internal network has an internal trusted
certificate authority (CA), and your OpenID server is using a certificate
issued by this CA, you can configure Kiali to trust certificates from this CA,
rather than disabling verification. For this, create a ConfigMap named
kiali-cabundle containing the root CA certificate (the public component)
under the openid-server-ca.crt key:
apiVersion: v1
kind: ConfigMap
metadata:
  name: kiali-cabundle
  namespace: istio-system # This is Kiali's install namespace
data:
  openid-server-ca.crt: <the public component of your CA root certificate encoded in base64>
After restarting the Kiali pod, Kiali will trust this root certificate for all
HTTPS requests related to OpenID authentication.
Using an HTTP/HTTPS Proxy
In some network configurations, there is the need to use proxies to connect to
the outside world. OpenID requires outside world connections to get metadata and
do key validation, so you can configure it by setting the http_proxy and
https_proxy keys in the Kiali CR. They use the same format as the HTTP_PROXY
and HTTPS_PROXY environment variables.
spec:
  auth:
    openid:
      http_proxy: http://USERNAME:PASSWORD@10.0.1.1:8080/
      https_proxy: https://USERNAME:PASSWORD@10.0.0.1:8080/
Passing additional options to the identity provider
When users click on the Login button on Kiali, a redirection occurs to the
authentication page of the external identity provider. Kiali sends a fixed set
of parameters to the identity provider to enable authentication. If you need to
add an additional set of parameters to your identity provider, you can use the
additional_request_params setting of the Kiali CR, which accepts key-value
pairs. For example:
spec:
  auth:
    openid:
      additional_request_params:
        prompt: login
The prompt parameter is a
standard OpenID parameter.
When the login value is passed in this parameter, the
identity provider is instructed to ask for user credentials regardless if the
user already has an active session because of a previous login in some other
system.
If your OpenId provider supports other non-standard parameters, you can specify
the ones you need in this additional_request_params setting.
Take into account that you should not add the client_id, response_type,
redirect_uri, scope, nonce nor state parameters to this list. These are
already in use by Kiali and some already have a dedicated setting.
Provider-specific instructions
Using with Keycloak
When using OpenId with Keycloak, you will need to enable the Standard Flow Enabled
option on the Client (in the Administration Console):
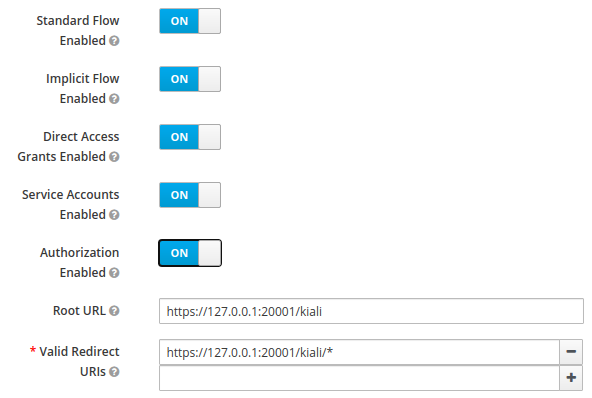
The Standard Flow described on the options is the same as the authorization
code flow from the rest of the documentation.
If you get an error like Client is not allowed to initiate browser login with given response_type. Implicit flow is disabled for the client., it means that
your signing key for Kiali is not a standard size (16, 24 or 32 bytes long).
Enabling the Implicit Flow Enabled option of the client will make the problem
go away, but be aware that the implicit flow is less secure, and not
recommended.
If you are using Google Cloud Platform (GCP) and its products such as
Google Kubernetes Engine (GKE), it should be straightforward to configure Kiali’s OpenID
strategy to authenticate using your Google credentials.
First, you’ll need to go to your GCP Project and to the Credentials screen which
is available at (Menu Icon) > APIs & Services > Credentials.
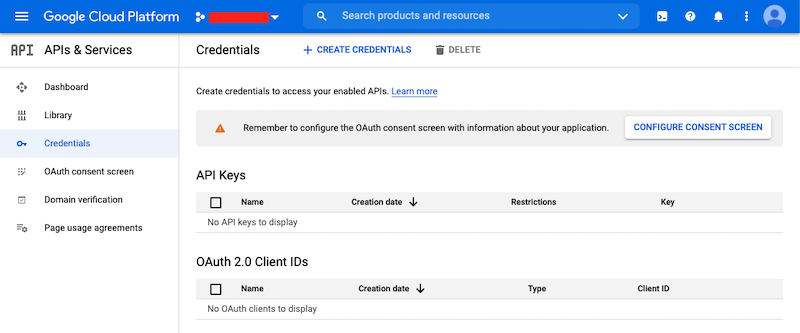
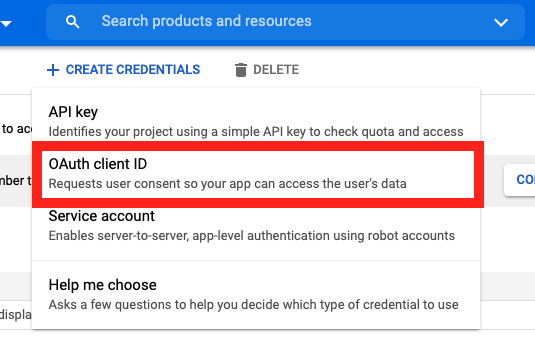
On the Credentials screen you can select to create a new OAuth client ID.
If you’ve never setup the OAuth consent screen you will need to
do that before you can create an OAuth client ID. On screen you’ll have multiple
warnings and prompts to walk you through this.
On the Create OAuth client ID screen, set the Application type to Web Application
and enter a name for your key.

Then enter in the Authorized Javascript origins and Authorized redirect URIs for your project.
You can enter in localhost as appropriate during testing. You can also enter multiple URIs as appropriate.
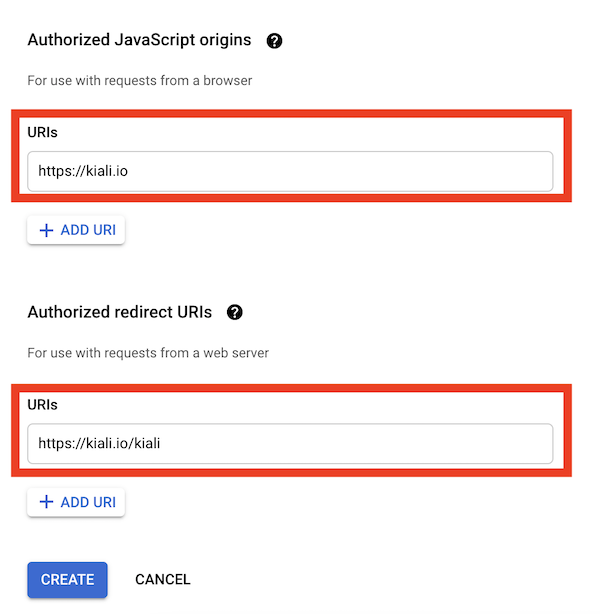
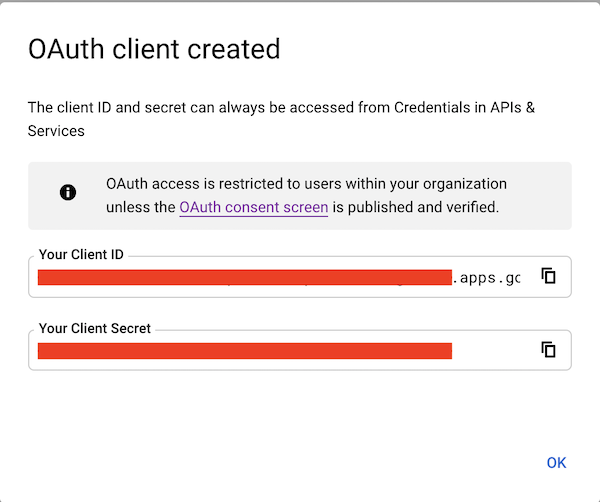
After clicking Create you’ll be shown your newly minted client id and secret. These are important
and needed for your Kiali CR yaml and Kiali secrets files.
You’ll need to update your Kiali CR file to include the following auth block.
spec:
  auth:
    strategy: "openid"
    openid:
      client_id: "<your client id from GCP>"
      disable_rbac: true
      issuer_uri: "https://accounts.google.com"
      scopes: ["openid", "email"]
      username_claim: "email"
Don’t get creative here. The issuer_uri should be https://accounts.google.com.
Finally you will need to create a secret, if you don’t have one already, that sets the oidc-secret for the openid flow.
apiVersion: v1
kind: Secret
metadata:
  name: kiali
  namespace: istio-system
  labels:
    app: kiali
type: Opaque
data:
  oidc-secret: "<base64 encode your client secret from GCP and enter here>"
Once all these settings are complete just set your Kiali CR and the Kiali secret to your cluster. You may need to
refresh your Kiali Pod to set the Secret if you add the Secret after the Kiali pod is created.
Using with Azure: AKS and AAD
The OpenID authentication strategy can be used
with Azure Kubernetes Service (AKS) and Azure Active Directory (AAD) with Kiali
versions 1.33 and later. Prior Kiali versions do not support RBAC on Azure.
AKS has support for a feature named AKS-managed Azure Active Directory, which
enables integration between AKS and AAD. This has the advantage that users can
use their AAD credentials to access AKS clusters and can also use Kubernetes
RBAC features to assign privileges to AAD users.
However, Azure is implementing this integration via the
Kubernetes Webhook Token Authentication
rather than via the Kubernetes OpenID Connect Tokens authentication
(see the Azure AD integration section in AKS Concepts documentation).
Because of this difference, authentication in AKS behaves slightly different from a standard
OpenID setup, but Kiali’s OpenID authentication strategy can still be used with
full RBAC support by following the next steps.
First, enable the AAD integration on your AKS cluster. See the
official AKS documentation to learn how.
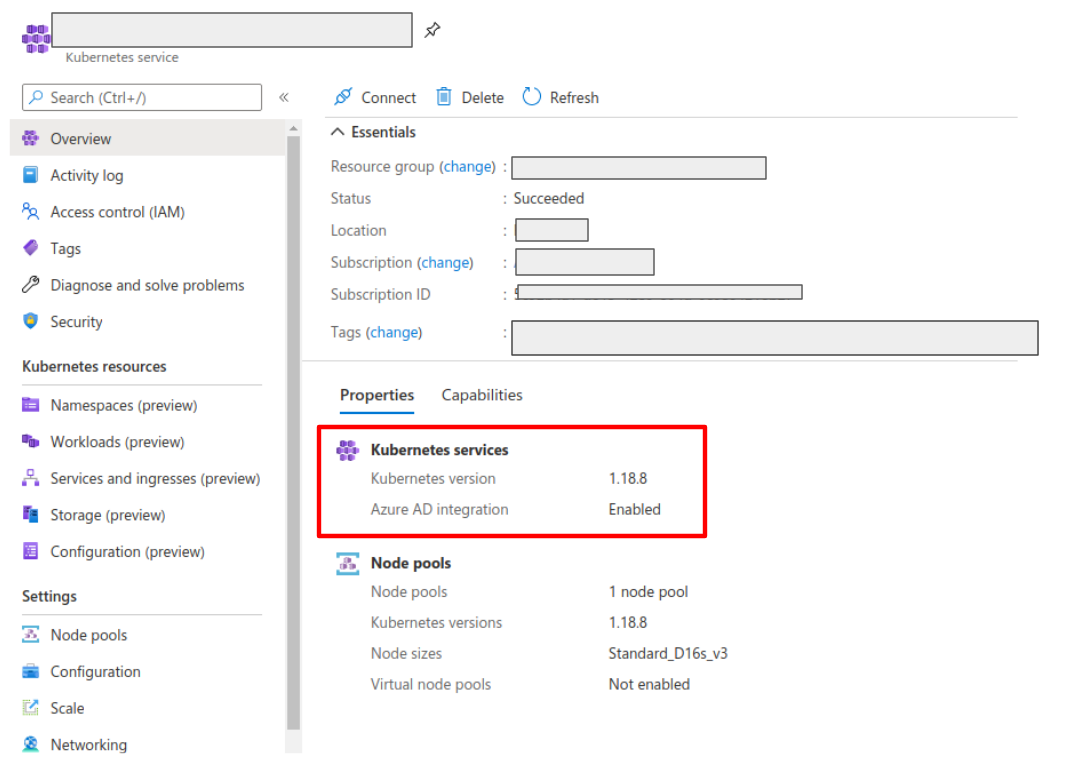
Once it is enabled, your AKS panel should show the following:
Create a web application for Kiali in your Azure AD panel:
- Go to AAD > App Registration, create an application with a redirect url like
\https://<your-kiali-url>
- Go to Certificates & secrets and create a client secret.
- After creating the client secret, take note of the provided secret. Create a
Kubernetes secret in your cluster as mentioned in the Set-up
with RBAC support section. Please, note that the suggested name for the
Kubernetes Secret is
kiali. If you want to customize the secret name, you
will have to specify your custom name in the Kiali CR. See: secret_name in Kial CR Reference.
- Go to API Permissions and press the Add a permission button. In the new page that appears, switch to the
APIs my organization uses tab.
- Type the following ID in the search field:
6dae42f8-4368-4678-94ff-3960e28e3630 (this is a shared ID for all Azure
clusters). And select the resulting entry.
- Select the Delegated permissions square.
- Select the
user.read permission.
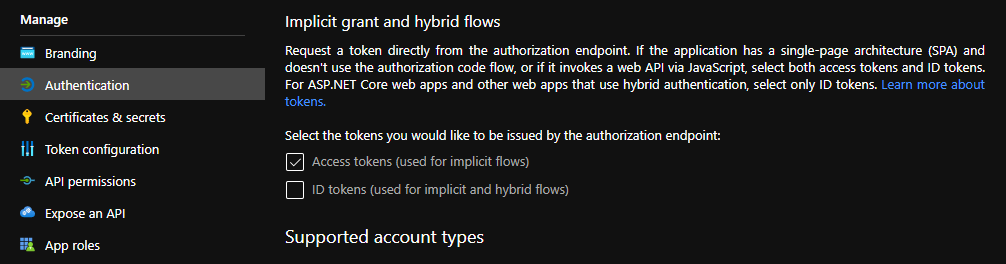
- Go to Authentication and make sure that the Access tokens checkbox is ticked.
Then, create or modify your Kiali CR and include the following settings:
spec:
  auth:
    strategy: "openid"
    openid:
      client_id: "<your Kiali application client id from Azure>"
      issuer_uri: "https://sts.windows.net/<your AAD tenant id>/"
      username_claim: preferred_username
      api_token: access_token
      additional_request_params:
        resource: "6dae42f8-4368-4678-94ff-3960e28e3630"
You can find your client_id and tenant_id in the Overview page of the Kiali
App registration that you just created. See this documentation for more information.
6 - Session options
Session timeout and signing key configuration
There are two settings that are available for the user’s session. The first one
is the session expiration time, which is only applicable to
token and header
authentication strategies:
spec:
  login_token:
    # By default, users session expires in 24 hours.
    expiration_seconds: 86400
The session expiration time is the amount of time before the user is asked to
extend his session by another cycle. It does not matter if the user is actively
using Kiali, the user will be asked if the session should be extended.
The second available option is the signing key configuration, which is unset by
default, meaning that a random 16-character signing key will be generated
and stored to a secret named kiali-signing-key, in Kiali’s installation
namespace:
spec:
  login_token:
    # By default, create a random signing key and store it in
    # a secret named "kiali-signing-key".
    signing_key: ""
If the secret already exists (which may mean a previous Kiali installation was
present), then the secret is reused.
The signing key is used on security sensitive data. For example, one of the
usages is to sign HTTP cookies related to the user session to prevent session
forgery.
If you need to set a custom fixed key, you can pre-create or modify the
kiali-signing-key secret:
apiVersion: v1
kind: Secret
metadata:
  namespace: "kiali-installation-namespace"
  name: kiali-signing-key
type: Opaque
data:
  key: "<your signing key encoded in base64>"
The signing key must be 16, 24 or 32 bytes length. Otherwise, Kiali will fail to start.
If you prefer a different secret name for the signing key and/or a different
key-value pair of the secret, you can specify your preferred names in the Kiali
CR:
spec:
  login_token:
    signing_key: "secret:<secretName>:<secretDataKey>"
It is possible to specify the signing key directly in the Kiali CR, in the
spec.login_token.signing_key attribute. However, this should be only for
testing purposes. The signing key is sensitive and should be treated like a
password that must be protected.